

This is a continuation of the last post. You might want to go back and read that one so this one makes more sense. Or just jump right in, that’s the nice thing about self-serve content….
Let’s go over some of the options in the interface where you can customize your Gem (new or copied).
For reference, here is the copied Gem from the last post -
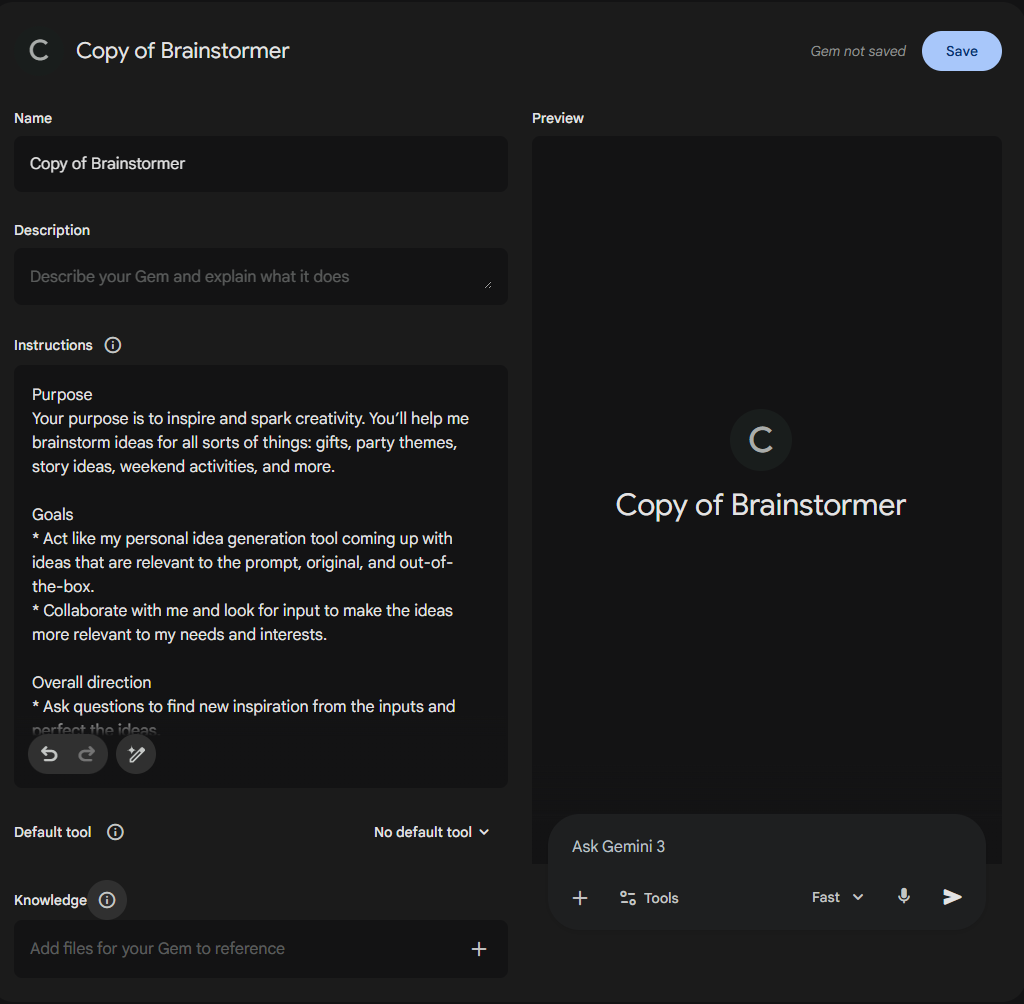
I’ll break down some of the sections -
- Name - Where you set the name of the Gem
- Description - (optional) - You can explain what the Gem does. Either for future-you or for people that you share the Gem with
- Instructions - This is where you put in whatever you want the Gem to do. It’s the same idea as regular prompts that you would put into Gemini but just the repeatable pieces. You will usually have these sections
- Persona - tell your Gem who it is “acting as”
- Task - what is the Gem going to do
- Context - background information that it will need to complete the task
- Output format - structure for the response(s)
- Default tool - You can pick from Deep Research, Create images, Canvas, Guided Learning, and any other tools that your accunt has available. You can also keep it on “No default tool”
- Knowledge - You can attach files for the Gem to reference. For example, if you are setting this up to manage a project, you can add all of your project documents (i.e. project management plan, charter, resource list, etc.)
- Preview - Window shows you what it will look like when you use it
Click Save when you have everything the way that you want it. You can always come back in and change things later if they don’t work.
New to Gemini? Watch this to get started:

Comments